Category Archives: Sweet Treats

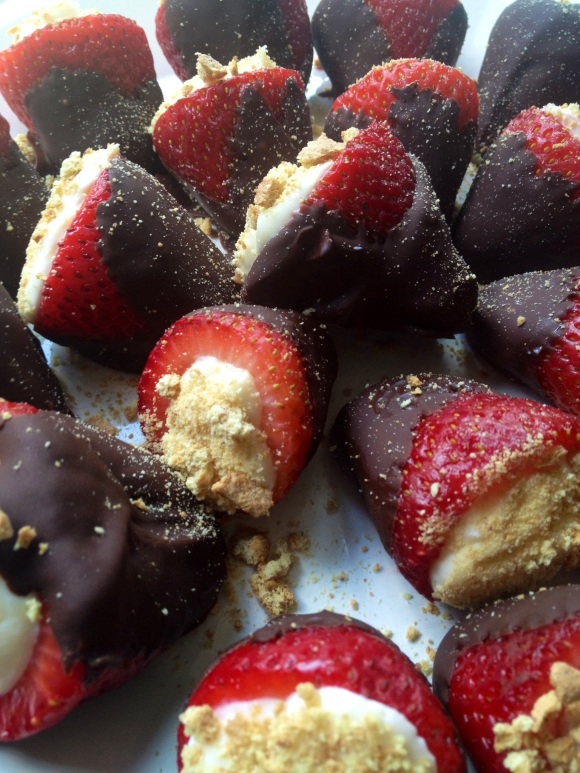
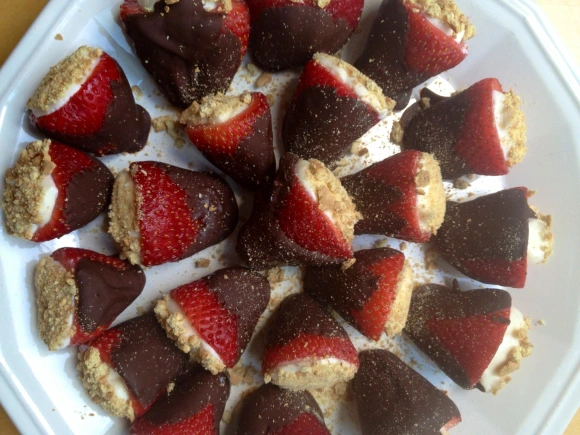
Cheesecake Filled Strawberries…Covered in Chocolate!

I recently had some guests over for dinner. I’m planning on sharing each of the recipes with you from the appetizer to dessert, but guess what? I’m starting with dessert!

20120624-145322.jpg

I made chocolate covered strawberries filled with cheesecake! These are no bake (no egg in the filling) and the only time consuming part is hulling out the strawberries. Here’s a little how-to from about.com. The only difference is that you’re going to cut out just a little bit more of the center to fit more filling! Now, I love gadgets but a strawberry huller is something I don’t see the point in buying, but if you have one, use that!

Once you rinse and hull your strawberries it’s super easy to complete. I’d say don’t prepare these more than a day in advance, because once you wash berries, their life on this earth is limited! You can always hull them BEFORE washing about a day before, and make the filling the day before and leave it in a ziploc bag. Then when you need to prepare them, wash, fill, and dip in chocolate.

Now, you don’t have to dip these in chocolate. They would be delicious without it, if you’re a strawberry purist!

The beauty of this recipe is that it can easily be doubled for entertaining at a party (just have a buddy to help you hull!).

20120624-145234.jpg

Chocolate Covered Cheesecake Filled Strawberries
(Makes about 20ish strawberries)

1 lb. fresh strawberries
1 8 oz. package of Neufchatel cheese (reduced fat cream cheese) or regular cream cheese, room temperature
1/4 – 1/3 c. confectioner’s sugar
1 tsp. vanilla extract
1 c. semi-sweet, dark chocolate, or milk chocolate chips
1 regular graham cracker

Wash and hull out your strawberries, throwing out the ones that aren’t a pretty, vibrant red. If they have mushy bad spots, don’t use them!

If you’re preparing your strawberries a day in advance, just hull out the strawberries and wash before filling.

In a stand mixer or using an electric mixture, beat your cream cheese on medium speed for 3-4 minutes until the cheese is fluffy and smooth. Add the confectioner’s sugar and vanilla and beat until combined. I say 1/4-1/3 cup sugar because if you want them a little sweeter, add some more!

Spoon mixture into a large ziploc bag (Tip: Put the ziploc bag into a drinking glass with one of the corners pushed down to the bottom of the glass. This allows you to easily fill with the mixture and puts it right to the corner.) With the bag open, squeeze the filling to the corner of the bag and let the air out. If you’re using this the next day, zip up the bag. If using right away, don’t worry about it. Snip off about 1/2″ of the corner of the bag.

Now, grab a strawberry. Put the tip into the center of the strawberry and squeeze from the top of the filling in the bag. Fill the strawberry until a little bit of the filling is coming out of the strawberry. Repeat until all the strawberries are filled.

In a microwave safe bowl, put your chocolate chips. Microwave in 30 second intervals until the chips soften (probably about 1 minute total), stirring between shifts. Once the chips are softened, stir until they’re a uniform melted goodness.

Grab your filled strawberries. Using tongs or your fingers dip strawberries into chocolate and lay onto a parchment or wax paper lined baking sheet. Repeat until the strawberries are covered.

Refrigerate until the chocolate is set, about 1-2 hours.

Crush up a graham cracker in a ziploc bag using the bottom of the glass. Pour onto a small plate. Dip the exposed cheesecake end of the strawberries into the crushed graham cracker, placing them onto your serving tray. Repeat until done. Sprinkle with remaining graham crackers. Refrigerate until you’re ready to use them!

Enjoy 🙂

Tagged , , , , , ,

Car Bombs for Dessert

I got this recipe from a fellow Komen volunteer a couple years back, now they are all over the place on foodgawker for St. Patrick’s day and the aftermath.

When I originally made them, I made regular sized cupcakes. I quickly found out I could only eat a quarter, maybe even a half, because they were so rich! These cupcakes are a Guinness chocolate cupcake with an Irish whiskey ganache center topped with Bailey’s spiked frosting.

Decadent, yes?

So this year I made them in mini form! While they were slightly more time consuming to pop the centers out to fill, the results were more worth it. The cupcakes were deliciously moist, and the leftovers are still super moist, even today!

20120322-161035.jpg

It made about 5 dozen mini cupcakes! I brought some to work on St. Patrick’s day and made Tim take a bunch to football. Everyone absolutely loved them!

Feel free to dye the frosting Irish colors if you’d like. I just got lazy cause I worked almost every day last week! I just topped mine with some orange and green sprinkles I had around.

For the alcohol in the recipe, if you don’t think you’ll drink a whole bottle of whiskey or Bailey’s eventually, buy the nips!

20120322-160934.jpg

Tip: Anytime you’re changing a recipe from normal muffin/cupcake size to mini (which I often do!) decrease the baking temperature to 325 and bake for 15-18 minutes.

Mini Car Bomb Cupcakes
(Makes about 5 dozen)

For the cupckes:

1 cup Guinness (drink the rest while they bake…)
1 cup (2 sticks) unsalted butter
3/4 cup unsweetened cocoa powder (preferably Dutch-process)
2 cups all purpose flour
2 cups sugar
1 1/2 teaspoons baking soda
3/4 teaspoon salt
2 large eggs
2/3 cup sour cream OR plain non-fat Greek yogurt (I substituted that this time and they were great!)

For the Whiskey Ganache:

8 oz. (about 1 cup) semi-sweet chocolate chips
2/3 c. heavy cream
2 tsp. Jameson

For the Bailey’s Buttercream:

2 sticks unsalted butter, room temperature
~ 4 c. confectioner’s sugar
3-4 tbsp. Bailey’s

Preheat the oven to 325 degrees. Line mini muffin tins with cupcake liners of your choice.

In a small saucepan, heat the cup of Guinness and 1 cup of butter to a simmer over medium heat. Then remove from heat and add 3/4 cup cocoa powder and whisk until smooth. The mixture gets deliciously thick! Cool slightly.

In a mixing bowl, combine the dry ingredients. In a stand mixer or another bowl, use an electric mixer to combine the eggs and sour cream or Greek yogurt until smooth. Slowly add the beer/chocolate mixture into the bowl and stir until mixed well. Then, gradually add the flour mixture on low speed until just combined.

Fill the cupcake liners about halfway – about a tablespoon of batter. Bake for about 15 minutes until a cake tester comes out clean. Pop them out onto a plate and continue along baking the rest of the cupcakes.

While the cupcakes cool, you can make the ganache. I found an easy was to make it – no double boiler necessary! Put the heavy cream into a microwave safe bowl. Nuke for about 2-2.5 minutes until the cream starts to bubble. At this point immediately add the chocolate chips. Keep mixing until the chocolate is a uniform looking sauce. I promise, it will eventually come together even though it looks odd at first! Add the whiskey. Stir to combine. Cool slightly.

When the cupcakes have cooled, time to hull out the center a bit. I took the tip of a paring knife and put it at a 45 degree or so angle halfway in between the center and edge. Keeping the knife at an angle, run the knife in a circle and the center should pop out. It sounds more complicated than it is. Basically you just want to get a little of the center out, without going all the way down to the bottom of the cupcake or breaching the sides.

Fill the center with ganache until it reaches the top. Repeat until you’re finished. If the ganache settles a bit into the cupcake, I just popped the top of the cupcake back on!

To make the frosting, put your room temperature butter into a mixing bowl. Whip on medium high speed until light and fluffy. Slowly add the powdered sugar. When you’ve added about 3.5 cups, add the Bailey’s. Test taste it. If you want more Bailey’s, add some more. At this point, you can add more sugar so the frosting becomes more stiff.

Place into a piping bag with a tip or ziploc bag. I used a ziploc bag and cut about 1 cm of the corner off. My cupcakes look like they have a little wave to them because the corner didn’t cut off cleanly and I ripped it the rest of the way off. I kind of like the effect it made 🙂

Top your cupcakes however you want with the frosting and decorate with sprinkles if you desire.

Enjoy!

Tagged , , , , , , , , ,

Mini Key Lime Pies

So there was actually quite a few recipes I had planned to post before this one since I just made them Saturday! But I’ve had a couple of requests for the recipe, so I let it jump the line.

I made these mini key lime bites for a surprise party on Saturday – they were a hit! Now I’ve said before I’m not a great baker (I hate to measure), but these were so easy to make. Anytime I bake a dessert I get nervous, so when people give me a lot of compliments it’s definitely a win for me!

20120306-102527.jpg

Did I use key limes for this? No, I didn’t. Have you ever seen key limes? The thought of zesting and juicing about 10 of those little guys just didn’t do it for me.

I found the original recipe on foodgawker here. I’m only making a couple changes based on how the recipe went for me. I’m decreasing the amount of graham cracker sheers from 18 to 14 (there was a TON of leftover!) so I’m also decreasing the amount of butter and sugar.

I also made my own concoction for the whipped cream topping – I used the zest of a couple of my limes and some honey to sweeten it. YUM!

While these take minutes to whip up, it’s the baking that is slightly time consuming. You have to wait for the crusts to cool before filling them. I popped mine in the freezer for about 10 minutes to speed the process along because I only had 2 mini muffin tins and you need 3 to complete these in one shot.

So please make this soon! They’re super impressive and delicious!

Mini Key Lime Pies
(Makes 3 dozen)

For the crust:

14 sheets of graham crackers (I used low fat)
6 tbsp. unsalted butter, melted
3 tbsp. sugar

For the filling:

4 egg yolks
Zest of 2 limes
1/2 c. lime juice (about 4 limes)
1 14 oz. can sweetened condensed milk

For the whipped cream:

1 c. heavy cream
Zest of 2 limes
2 tbsp. honey

Optional toppings: Toasted coconut, sugared lime pieces

Preheat the oven to 325 degrees.

You know those 4 limes you’re going to juice for the filling? Zest them all first. Divide in half.

In a mixing bowl, whip together the yolks and half of your lime zest for about a minute. Then add the lime juice and sweetened condensed milk. Mix well for about 1-2 minutes. Let sit for 10 minutes.

In a blender or a food processor, crush graham crackers until fine. Mix in the melted butter and sugar.

Grease 3 mini muffin tins with cooking spray. Put a spoonful of graham cracker mixture into each hole. It should come right up to the top.

20120306-102617.jpg

Then press around with your fingers to create the crust. Press down firmly and push up the sides.

20120306-102701.jpg

Bake for about 10 minutes until the crusts are lightly browned and fragrant.

Cool at room temperature or if you’re impatient like me, pop in the freezer for about 10-15 minutes.

Now it’s time to fill! Put the muffin tins on a baking sheet (it makes it easier to transfer). Fill each hole with about a tablespoon of filling. It should reach almost to the top. (Note: still have left over graham cracker mixture? Save it to top the bites with it after the whipped cream)

20120306-102747.jpg

Put the muffin tins in the oven. Bake for about 10 minutes. The filling should be set and just slightly jiggly. Allow to cool COMPLETELY before trying to get them out. Again, you can pop in the freezer (or refrigerator) until they’re cool to touch.

When you’re ready to get them out, run a paring knife along the edges of each key lime bite. Gently slide a spoon or the edge of the knife under an edge of the bite, and slip out. It’s ok if some graham cracker doesn’t make it! Check out what happens when you don’t push down firmly enough.

20120306-103435.jpg

But hey, that one still tasted good!

To make the whipped cream before serving, pop your metal mixing bowl along with the whisk or whisk attachment into the freezer for about 10 minutes. See how awesomely cold it is? It helps the whip cream beat up faster!

20120306-102835.jpg

Add in your 1 cup of cream. Beat until you have soft peaks. Then add the honey and your remaining lime zest. Beat until you have stiff peaks. Stiff peaks are when you put the whisk in the whipped cream, pull it out, turn it over and the peak stays up in the air. Soft peaks, the peak would just gently curl over. Just don’t beat it past the stiff peak phase – we’re not trying to make butter 🙂

To top the key lime bites, you can spread whipped cream around with a spoon, or just put the cream in a ziploc bag and cut about 1/4″ off the corner. Use a swirl motion while pressing on the bag. Sprinkle with leftover graham cracker if desired. Top with toasted coconut and/or sugared lime slices.

Sugared Lime Slices

6 lime slices, sliced very thin
1/4 c. sugar

Cut up your lime very thin. Like this.

20120306-102917.jpg

Then slice into 8 pieces like a pizza.

20120306-102955.jpg

Dry with a paper towel. Toss with sugar. Spread them out separately and let them sit for about an hour (they’ll kind of liquefy and turn slightly gummy – they’re delish).

Tagged , , , , , ,

Chocolate for Breakfast

Yep. Now this isn’t something I do often. But I thought it would be appropriate to make these Valentine’s Day morning!

I found the original recipe on foodgawker, of course. I tweaked the ingredients based on what I had, and added some dark chocolate chips to make it even MORE chocolatey! I also doubled the recipe because I was making them for two 🙂

I guarantee if you have kids, they’ll love these for breakfast! And they’re not super unhealthy, in fact, you get to sneak in some whole grains in a low fat, decadent breakfast.

My pancakes were topped with light whipped cream, but you could also use powdered sugar, chocolate syrup, or peanut butter. Go nuts!

20120302-132119.jpg

Chocolate Pancakes
(Makes about 8-10 3″ pancakes)

1/2 c. spelt, whole wheat or all purpose flour
1/2 tsp. baking powder
2 tbsp. dutch cocoa powder
2 tbsp. honey (or 1 1/2 packets stevia)
1/8 tsp. salt
1 1/2 tbsp. applesauce or oil (I used regular olive oil – no extra virgin here!)
2 tsp. vanilla extract
2/3 c. milk of choice (minus 1 tbsp)
1/3 c. dark chocolate chips
Optional toppings: whipped cream, powdered sugar, peanut butter, syrup, chocolate syrup, butter, etc.

Heat a large frying pan over medium high heat. When water sprinkled onto the pan bubbles, it’s ready to go!

Mix dry ingredients together in one bowl. Mix wet ingredients together in another bowl. Combine wet into dry until just mixed then fold in chocolate chips.

Spray the pan with cooking spray just before use. Turn the pan down to medium heat. Use about 1/4 c. batter for each pancake. They’re ready to flip when the edges bubble and start to look dry. The second side only needs a minute or two!

Serve immediately, or keep warm in the oven until ready to use.

Tagged , , , , ,

Lava Cake For One?

I definitely have a sweet tooth, mostly a craving for chocolate. I’ve seen mug cake recipes on foodgawker, but they seem to all have that rubbery texture because, after all, it’s made in the microwave.

So I got super excited when I saw this recipe for molten lava cake for one! It’s SO delicious and it’s not too bad for you. Hooray!

The original recipe posted on girl who bakes clocks in at about 170 calories. Not too bad for a delicious, warm chocolatey cake!

I even doubled this once to make it for Tim and I. It still turned out great! Just divided it evenly into 2 separate ramekins.

20120219-104525.jpg

Molten Lava Cake for One
(Serves 1)

2 1/2 tbsp. all-purpose or whole wheat flour
1 1/2 tbsp. granulated sugar, or honey
1 heaping tbsp. unsweetened cocoa powder
1/8 tsp. baking soda
pinch of salt
3 tbsp. milk (I used skim)
1 tbsp. nonfat plain Greek yogurt
1/4 tsp. vanilla extract

Preheat oven to 350 degrees. Grease a small 7 oz ramekin, or other small, glass ovenproof bowl with cooking spray.

Mix dry ingredients in one bowl and wet ingredients in another. Pour wet into dry and stir until just incorporated.

Pour into prepared dish. Cook for about 12-15 minutes, until the sides are set and the top is just set. Mine took about 13 minutes.

Take out of the oven and let rest for a couple minutes. Put a plate over top and flip over to invert. Or just eat it straight out of the container! Top with whipped cream or powdered sugar, if desired.

20120219-104619.jpg

Tagged , , ,

A Birthday Suprise for Two Little Girls!

It was two of Tim’s nieces birthdays over the past month, so his sister had a joint birthday get together for the family this past weekend. I decided to make a little something special for them: rainbow cupcakes!

20120214-120548.jpg

My friends made me a rainbow birthday cake back in college, and it was super fun and unique! I wanted to make it a little easier… I used boxed white cake mix. Shhh. But hey, you get to make them your own by making a delicious swiss meringue buttercream frosting! It’s super easy and it is DELISH.

I found the frosting recipe on Annie’s Eats. I figured with birthday cupcakes, it would be the perfect time to try such a delicious looking buttercream! I was right. It turned out great. The cupcakes were a huge hit.

20120214-120640.jpg

Now, don’t be too scared by this frosting, it really is easy to make and it’s so worth it. I found that the original recipe tasted too much like pure butter, so I added about 1 cup of powdered sugar. So you can use your judgment and add it if you want. Also, feel free to use your favorite flavorings instead of vanilla! Like your favorite flavored liquor or maybe some almond extract.

Put this over your favorite cake recipe if you don’t like boxed or don’t want rainbow cupcakes. I also used some pink and purple sprinkles for the girls’ favorite colors. You can omit them or top them with whatever tickles your tastebuds.

20120214-120746.jpg

Rainbow Cupcakes with Swiss Meringue Buttercream Frosting
(Makes about 18 cupcakes)

For the Cupcakes:

1 box of white cake mix, and the ingredients to prepare it
Neon food coloring (I like the really bright colors it makes!)

For the Buttercream:

5 egg whites
1 c. plus 2 tbsp. granulated sugar
Pinch of salt
1 lb. (4 sticks) unsalted butter, room temperature
2 tsp. of vanilla extract
1 c. of powdered sugar (or enough to your liking), optional

To make the cupcakes…

Preheat the oven according to package directions. Make the cake mix according to package directions.

Grease or line your muffin tin with cupcake liners.

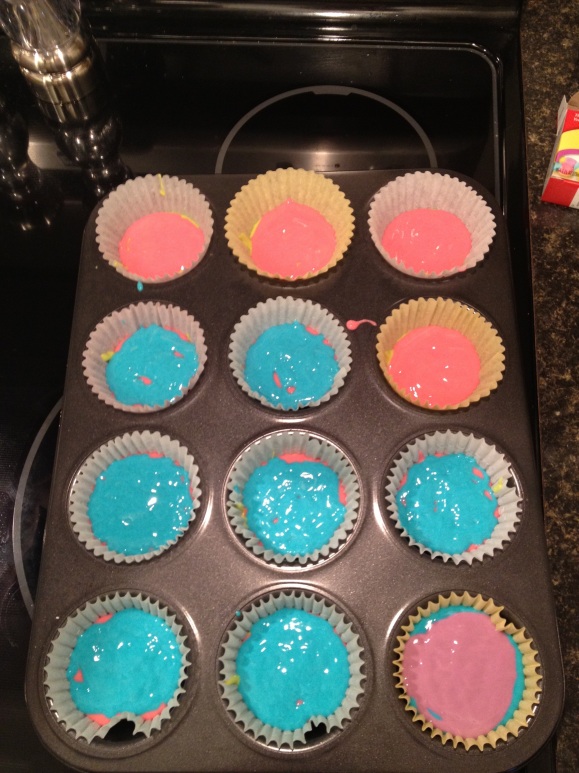
Divide your cupcakes evenly into bowls. I used 4 different colors. Neon green, pink, purple, and blue. There’s a guide on the back of the food coloring box to making different colors. It’s adjusted for a whole package of cake mix, so I used 8 drops for the purple and blue batters, and 10 drops for the pink and green batters. Mix well.

20120214-120827.jpg

Using a tablespoon from my regular silverware, scoop one tablespoon of color into each cupcake liner. I started with green. Then go around with your second color, third, fourth etc. The colors won’t run together or anything, they stay separated!

20120214-120917.jpg

Bake according to package directions, or until a toothpick comes out clean. Let cool completely before frosting. Look how rainbow-y they are!

20120214-121013.jpg

To make the buttercream…

Fill a medium saucepan 1/3-1/2 full of water. Bring to a simmer.

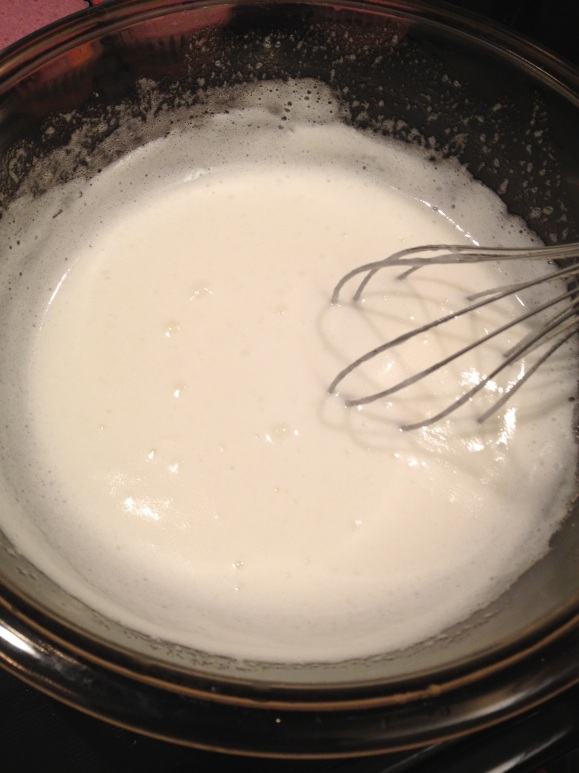
Meanwhile, whisk together the egg whites, sugar and salt in a heatproof bowl. Place the bowl on top of the simmering water. You do NOT want the water to touch the bowl, so make sure that doesn’t happen. Whisk the mixture frequently until it reaches 160 degrees, or until the sugar is dissolved and the whites are nice and glossy.

20120214-121105.jpg

Place the mixture into a stand mixer bowl and, using the whisk attachment, beat on medium speed until the mixture cools to room temperature and the whites turn into firm, stiff peaks, about 8 minutes.

At this point, add in your butter 2 tablespoons at a time, adding more after each addition. (Tip: Forget to take the butter out of the fridge? Pop in the microwave in the wrapper for about 30 seconds on a low power. Check it about every 10 seconds until it’s just starting to soften!)

Then add in your vanilla extract, and powdered sugar if desired. Mix until just incorporated.

20120214-121144.jpg

Spread on cooled cupcakes with a knife or pipe on with a ziploc bag with a corner clipped off with or without a pastry tip in.

Sprinkle on toppings if you’d like. Hope you like them!

20120214-121224.jpg

Tagged , , ,

Sweet and Salty Toffee

Well. This isn’t a cookie recipe but it falls along the same lines. It’s toffee made out of saltine crackers.

I’ve had the variety made with graham crackers, but there’s something that drew me to the saltines…most likely the salty-sweet combination that they would lend to the toffee.

I made it this morning, at about 7:30. I have a really difficult time sleeping in once I’m getting up at 6AM 4 days a week! So I thought why not make myself useful since I still have so much to do before Christmas.

I snuck a piece of it, and let me tell you, it’s delicious. The sweet-salty combo is oh-so-good. And like most of my recipes, very easy to make. The best part? You don’t even need a candy thermometer! Though, it is on my list of things to get because I’m making a salted caramel tart for Christmas dessert…. I know. I can’t wait, it sounds delicious. And more of that sweet and salty mix 🙂

It takes no time at all to whip this up, and with only 4 (maybe 5 ingredients if you so choose), it’s definitely a winner in my book!

Saltine Toffee
(Makes 1 sheet pan)

1 c. unsalted butter (2 sticks)
1 c. brown sugar
About 40 saltines
12 oz. bag Ghiradelli’s semi-sweet chocolate chips (or another good quality chocolate)
¼ – ½ c. finely or coarsely chopped pecans, walnuts, etc. – whatever you want to top it with if you desire

Preheat the oven to 350 degrees. Line a rimmed baking sheet with foil and spray with a cooking spray. Line with an even layer of saltines.

Melt the butter and sugar in a saucepan on the stove on medium heat. Once it begins to boil, reduce heat to medium-low and allow to simmer for 5-6 minutes until the sugar dissolves and the mixture thickens.

Pour the mixture over the saltines and spread to evenly coat. Pop in the oven for about 6-10 minutes (depending on your oven), until the toffee is bubbling.

Remove from the oven and allow to sit for about 3-5 minutes. Pour the chocolate chips on top and allow to melt. I popped mine back in the warm oven that I had turned off, for just a few minutes.

Spread the chocolate into an even layer. Add nuts or whatever topping you’d like at this time. Put in the fridge until hardened, about 1-2 hours.

Break into whatever sized pieces you want. I found they broke into cleaner pieces if i had the chocolate facing up and folded the sides downwards so the breaking area comes up…. hope that makes sense! Enjoy!

A Couple Names. One Great Taste!

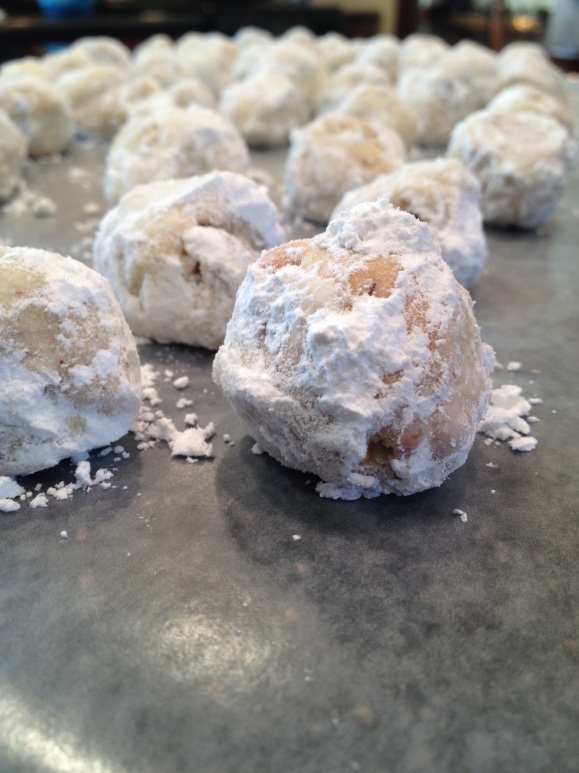
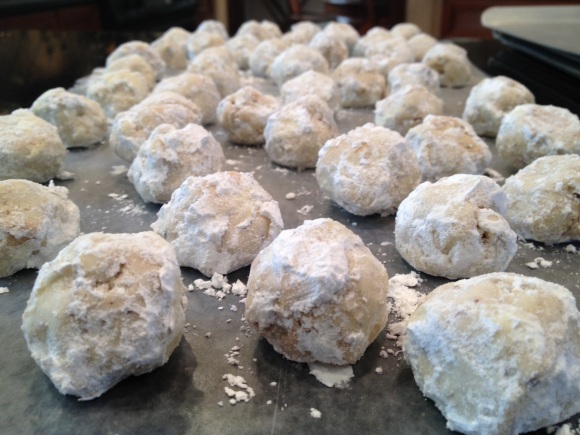
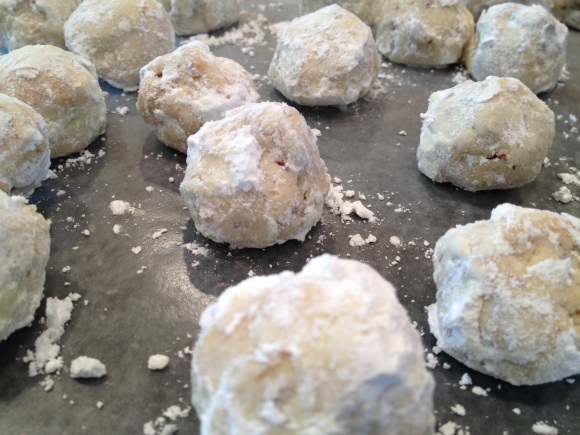
Yes, I wanted to give you another cookie recipe for the holiday season! Some people know these as snowballs; I know them as Mexican wedding cake.

Delicious little balls of cookie that practically melt in your mouth. They are amazing. And super simple to make!

20111218-171032.jpg

They only use a few ingredients, which is good for those of you looking to save a little extra money around the holiday season.

You really don’t want to make these too big, a little smaller than a golf ball… Maybe more like the size of those large gumballs you see around.

20111218-171659.jpg

Also, wait about 5 minutes before rolling the warm cookies in the powdered sugar after baking. If you do it too soon the sugar will just melt and be gooey. Though if you wait too long the sugar won’t stick!

Mexican Wedding Cake
(Makes about 50 cookies)

1 c. butter (2 sticks), room temperature
1/2 c. powdered sugar
1 tsp. vanilla
2 1/4 c. all-purpose flour
1/4 tsp. salt
3/4 c. pecans, finely chopped

Preheat the oven to 400 degrees. Line a baking sheet with parchment paper.

Cream together butter, sugar and vanilla. Slowly add in flour and salt. Once combined, add pecans.

Roll pieces of dough slightly smaller than a tablespoon into balls. Place about 1 1/2″ apart from each other on the baking sheets.

Bake for 10-12 minutes until cookies are just barely browned.

Cool for about 5 minutes and roll in powdered sugar while warm.

20111218-172524.jpg

Tagged , , , , , ,

Christmas-y Cookies!

Christmas season automatically means baking cookies for me! This year instead of cookies that my mom and I usually make, I threw in these bad boys: white chocolate cranberry macadamia nut cookies.

Is your mouth watering? It should be. They’re incredible! And they fit in perfectly with Christmas because of the colors. Don’t you think?

20111214-190032.jpg

I got the recipe from my labor ad delivery instructor. She made them last year for baskets we made for nurses on the floor about a year ago. And I haven’t forgotten about them!

I highly suggest that you make these very soon. Or now. Whatever is best for you 🙂

20111214-191234.jpg

White Chocolate Cranberry Macadamia Nut Cookies
(Makes about 50 cookies)

3 c. all purpose flour
1 tsp. baking soda
3/4 tsp. salt
1 c. (2 sticks) unsalted butter, room temperature
1 c. packed brown sugar
3/4 c. granulated sugar
2 eggs
1/2 tbsp. each of vanilla extract and almond extract
1 1/2 c. dried cranberries
1 1/2 c. white chocolate chips
1 c. coarsely chopped macadamia nuts

Preheat oven to 350 degrees. Line at least 2 baking sheets with parchment paper.

Combine the first 3 ingredients in a bowl.

With a stand or electric mixer, beat the butter until fluffy. Then add the sugars and cream together. Beat in eggs one at a time, then the extracts.

Slowly add the dry ingredients and beat until just blended. Fold in cranberries, white chocolate chips, and nuts.

Drop dough by level tablespoonfuls onto your cookie sheets, about 1.5″ apart. Or use your fingers and make the balls of dough a little smaller than golf balls.

20111214-191859.jpg

Bake cookies until just barely golden, about 12-15 minutes (depending on your oven), switching the sheets halfway through.

Cool cookies before serving if you can wait that long!

20111214-191732.jpg

Tagged , , ,

Pumpkin Cupcakes, Anyone?

Hello, everyone! Miss me? I apologize for the long hiatus. I kept forgetting to bring the camera cord back to my apartment, I started my new job and then my power cord for my laptop broke!

So I have a fantastic recipe to kick off having more recipes. Pumpkin cupcakes with cream cheese frosting. Yum!

I made these for a friend’s Thanksgiving dinner. I chose to do them in miniature form 1) because after all the delicious food that was eaten for dinner I didn’t think a full cupcake would be super appetizing and 2) everything tastes better in mini form.

I found this really easy recipe on foodgawker. And let me tell you. I HATE the word moist, but these cupcakes were so moist it was almost hard to tell when they were done!

The original recipe for the cream cheese frosting turned out a little thinner than I would’ve liked. It called for 1/4 cup of milk, but I recommend leaving it out at least at first to check the consistency. I also added more powdered sugar.

I hope this makes up for no recipes for almost 2 weeks!

Pumpkin Cupcakes with Spiced Cream Cheese Frosting
(Makes about 4 dozen mini cupcakes)

For the cupcakes:

1 box yellow or white cake mix
1 15 oz can pumpkin puree (minus ¼ cup)
½ c. water

For the icing:

8 oz. Neufchatel or cream cheese
¼ c. pumpkin puree
2/3 – 1 c. powdered sugar
3 tbsp. brown sugar
1 tsp. pumpkin pie spice
½ tsp. cinnamon

Preheat the oven to 25 degrees less than your boxed cake mix says to set for normal sized cupcakes. Line or grease your mini muffin trays.

In a bowl, mix together your box of cake mix, pumpkin puree and water. NO oil or eggs, isn’t it great?

Fill your mini muffin cups about ¾ of the way full with batter. About 1 heaping tablespoon of batter.

Pop in the oven for about 15-20 minutes. Every oven is different, so please start checking them after 15 minutes, then about every 3 minutes depending how your toothpick comes out (it should be clean). Allow to cool before icing.

If you want normal sized cupcakes, cook according to package directions.

Meanwhile, in an electric mixer, beat room temperature cream cheese until smooth and fluffy. Add in remaining ingredients and beat until incorporated. Taste it, if you think it needs more sugar or spices, feel free to add! Put into a ziploc or piping bag and place in the fridge for later.

When it’s time to ice the cupcakes, you can either spread it on with a knife, or cut the edge off of your ziploc bag and pipe away. If you have a fancy pastry bag with tips, go nuts!

Tagged , , , ,