Category Archives: Entertaining Ideas

Grilling Season is Nearing Its End

Hello friends, family and fans! I’ve missed you. Hope you all had a great summer! And hope you all were able to get away from your lives at least a little bit with some sort of vacation 🙂

Sorry for my absence…I took an impromptu summer sabbatical from sitting on my computer. I needed to attempt to recharge my batteries whenever possible after work, getting another kitten and the awful heat of summer. Did I want to sit in front of a computer? Not so much.

So, as I sat here recuperating from the weekend, watching Julie & Julia (how appropriate), having multiple things cooking in the kitchen for the week, and looking out at a gloomy, rainy day, I felt it was time to start back up again.

In honor of the end of summer as most of us know it, I wanted to give you an amazing grilling recipe to finish off the season. I made these awhile back for some guests and they were DELISH.

What is it? Chicken and apricot skewers from my Cooking For Friends Williams-Sonoma cookbook.

20120903-154000.jpg

(You can see why you should soak your skewers for at least an hour… :))

The chicken is marinated in a yogurt and spices to tenderize the chicken. The result? Heaven. This recipe is especially good if you get sick of chicken from time to time (like me). It gives it a distinct and unique flavor that is to die for.

And throwing fruit on the skewer to grill? Amazing. Grilled stone fruit (think plums, apricots, peaches, etc) and pineapple is a fantastic side dish or dessert option for the summer.

Without further ado, here’s how to say adieu to the grill in a new and delicious way 🙂

Grilled Chicken Skewers with Apricots
(Serves 4-6)

3 boneless, skinless chicken breasts, cut into 1 inch cubes
1/2 c. plain, nonfat Greek yogurt
1 tbsp. ground coriander
1 clove garlic, minced
1/2 tsp. cumin, cayenne, and turmeric
4 apricots, cut into 1 inch chunks
1/2 lemon
Olive oil
Salt and pepper

In a bowl, stir together yogurt, coriander, garlic, turmeric, cumin, cayenne, and salt and pepper to taste. Add in cubed chicken. Refrigerate for at least 6 hours or overnight. Put aside your apricots until you’re ready to use them (you can definitely chop them up in advance!).

When you’re ready to grill, soak your skewers (if you’re using wooden ones – I had 10″ inch ones) for at least an hour. Toss your apricot chunks in a tablespoon of olive oil. Thread about 4 chicken cubes and 3 apricot chunks onto each skewer, alternating each.

Place onto a hot grill or grill pan, brushed with olive oil. Cook for 4-5 minutes per side, until nicely charred.

To serve, put on a platter and squeeze a little bit of lemon over the top. Enjoy!

Tagged , , , , , ,

An Easy, Impressive & Delicious Starter

Like I said in my last post, I had some guests over for dinner. I wanted a quick & easy appetizer so I could spend time with my guests. What did I go to for help? My newest cookbook in my collection – Williams Sonoma Cooking For Friends. The one I got from Tim for my birthday!

This starter is a puff pastry pizza-like dish. It has pears, walnuts, rosemary and Gorgonzola cheese. Basically a combination that is mouthwatering before and after your first bite. To make it even better? Drizzle it with a little bit of honey. SO GOOD.

If you want to be adventurous, make your own puff pastry. I wouldn’t even bother though, because there’s great options in your grocery’s freezers. You just have to thaw it according to package directions beforehand.

The cookbook said to cut the sheet in half, roll out a bit and then score the edges. Did I do that? No. Not so much. All I did was lay the sheet out flat on a parchment lined baking sheet & flattened the dough a bit with my fingers. I bet it tasted the same. The directions called to fold over the edge of the puff pastry about 1/2″ to make a border. I think if I did this again (which I will!) I’m not going to make a border and just score 1/2″ of the edge with a fork. I don’t think it really needed the border.

20120626-165848.jpg

Puff Pastry Tart with Pears, Walnuts & Gorgonzola
(Serves 4-6)

1 sheet puff pastry, thawed according to package directions
1 Bosc pear
1/4 c. walnuts, chopped
1 sprig of rosemary, stripped from the stem, finely chopped
1/4 – 1/3 c. Gorgonzola cheese
Honey

Preheat your oven to 400 degrees.

Lay out your thawed puff pastry sheet onto a parchment lined baking sheet. Using your fingers, flatten the dough out slightly, pushing towards the edges to thin out the dough slightly. Fold the edge over about 1/2″ to make a border (optional) then score the edges with a fork.

Cut your pear down the middle lengthwise, then cut in half again lengthwise. Angling your knife, cut out the center of your pear, this will get the core out. Then, slice into 1/4″ slices.

Lay your pear slices however you’d like onto your puff pastry sheet. Sprinkle with walnuts, cheese and rosemary.

Pop in the oven for 20-25 minutes or until the edges of the pastry are browned and puffed up.

Let sit for about 5 minutes, drizzle with honey, slice into desired pieces and enjoy!

Tagged , , , , , ,

Cheesecake Filled Strawberries…Covered in Chocolate!

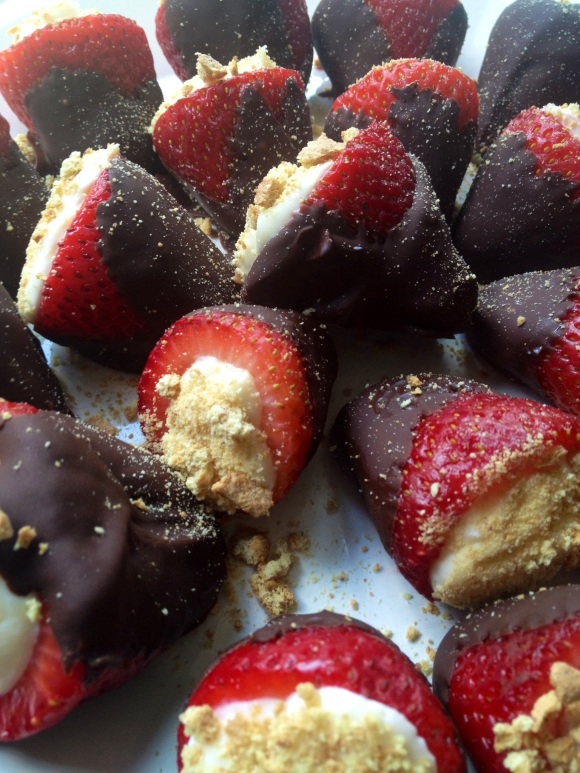
I recently had some guests over for dinner. I’m planning on sharing each of the recipes with you from the appetizer to dessert, but guess what? I’m starting with dessert!

20120624-145322.jpg

I made chocolate covered strawberries filled with cheesecake! These are no bake (no egg in the filling) and the only time consuming part is hulling out the strawberries. Here’s a little how-to from about.com. The only difference is that you’re going to cut out just a little bit more of the center to fit more filling! Now, I love gadgets but a strawberry huller is something I don’t see the point in buying, but if you have one, use that!

Once you rinse and hull your strawberries it’s super easy to complete. I’d say don’t prepare these more than a day in advance, because once you wash berries, their life on this earth is limited! You can always hull them BEFORE washing about a day before, and make the filling the day before and leave it in a ziploc bag. Then when you need to prepare them, wash, fill, and dip in chocolate.

Now, you don’t have to dip these in chocolate. They would be delicious without it, if you’re a strawberry purist!

The beauty of this recipe is that it can easily be doubled for entertaining at a party (just have a buddy to help you hull!).

20120624-145234.jpg

Chocolate Covered Cheesecake Filled Strawberries
(Makes about 20ish strawberries)

1 lb. fresh strawberries
1 8 oz. package of Neufchatel cheese (reduced fat cream cheese) or regular cream cheese, room temperature
1/4 – 1/3 c. confectioner’s sugar
1 tsp. vanilla extract
1 c. semi-sweet, dark chocolate, or milk chocolate chips
1 regular graham cracker

Wash and hull out your strawberries, throwing out the ones that aren’t a pretty, vibrant red. If they have mushy bad spots, don’t use them!

If you’re preparing your strawberries a day in advance, just hull out the strawberries and wash before filling.

In a stand mixer or using an electric mixture, beat your cream cheese on medium speed for 3-4 minutes until the cheese is fluffy and smooth. Add the confectioner’s sugar and vanilla and beat until combined. I say 1/4-1/3 cup sugar because if you want them a little sweeter, add some more!

Spoon mixture into a large ziploc bag (Tip: Put the ziploc bag into a drinking glass with one of the corners pushed down to the bottom of the glass. This allows you to easily fill with the mixture and puts it right to the corner.) With the bag open, squeeze the filling to the corner of the bag and let the air out. If you’re using this the next day, zip up the bag. If using right away, don’t worry about it. Snip off about 1/2″ of the corner of the bag.

Now, grab a strawberry. Put the tip into the center of the strawberry and squeeze from the top of the filling in the bag. Fill the strawberry until a little bit of the filling is coming out of the strawberry. Repeat until all the strawberries are filled.

In a microwave safe bowl, put your chocolate chips. Microwave in 30 second intervals until the chips soften (probably about 1 minute total), stirring between shifts. Once the chips are softened, stir until they’re a uniform melted goodness.

Grab your filled strawberries. Using tongs or your fingers dip strawberries into chocolate and lay onto a parchment or wax paper lined baking sheet. Repeat until the strawberries are covered.

Refrigerate until the chocolate is set, about 1-2 hours.

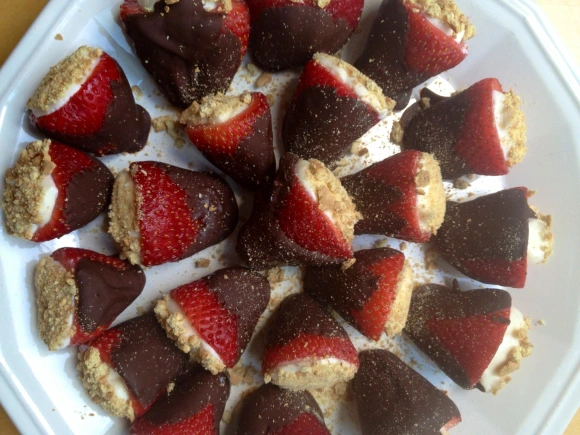
Crush up a graham cracker in a ziploc bag using the bottom of the glass. Pour onto a small plate. Dip the exposed cheesecake end of the strawberries into the crushed graham cracker, placing them onto your serving tray. Repeat until done. Sprinkle with remaining graham crackers. Refrigerate until you’re ready to use them!

Enjoy 🙂

Tagged , , , , , ,

Innovation with Cupcakes!

Sometimes I am clever. In my last post, I mentioned that there was a gathering for a friend’s birthday party. Here I was making pretzels and cupcakes! Perhaps I should have just stuck to one, but I like to be ambitious.

How was I clever? I had 24 cupcakes that I needed to display for friends…how should I go about doing this when I don’t have a large enough tray on hand? Well, I made a makeshift cake stand!

I took the largest platter I had available to me, flipped a soup bowl upside down, and placed a dinner plate on top. Voila! The bottom cupcakes I angled on the side of the bowl so the tops could be seen.

If you have fancy plates, bowls, and trays, the possibilites are endless! I can tell you’re thinking of what’s in your kitchen right now. Have anything cool? Maybe even a decorative mug to use instead of a bowl? Or to add another tier with a salad plate on top?

Who needs to buy a cupcake stand?!

Next time... I'm flipping the platter upside down.

Tagged , ,